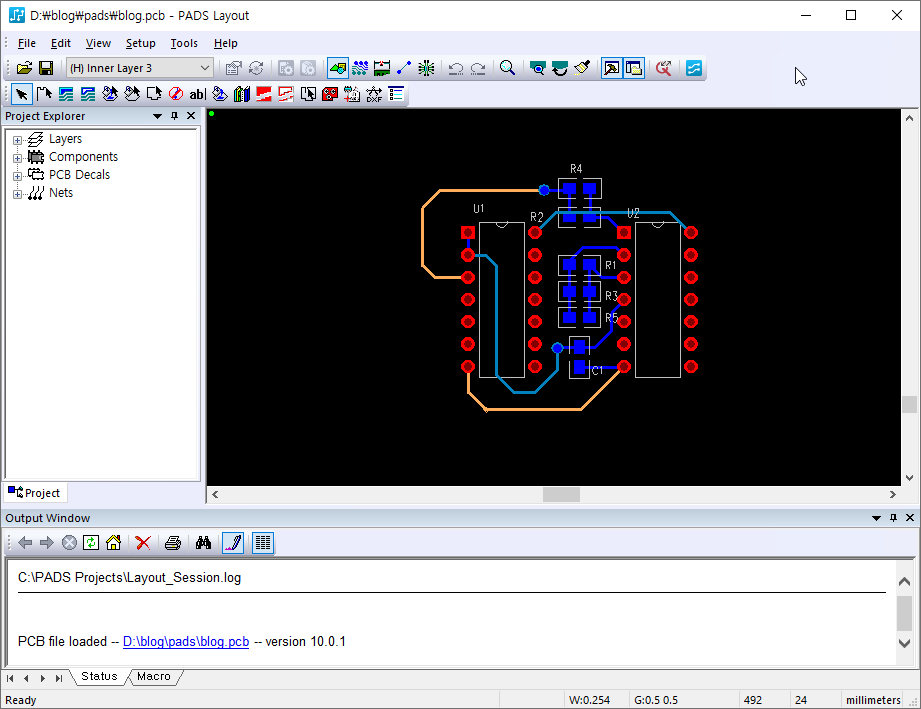
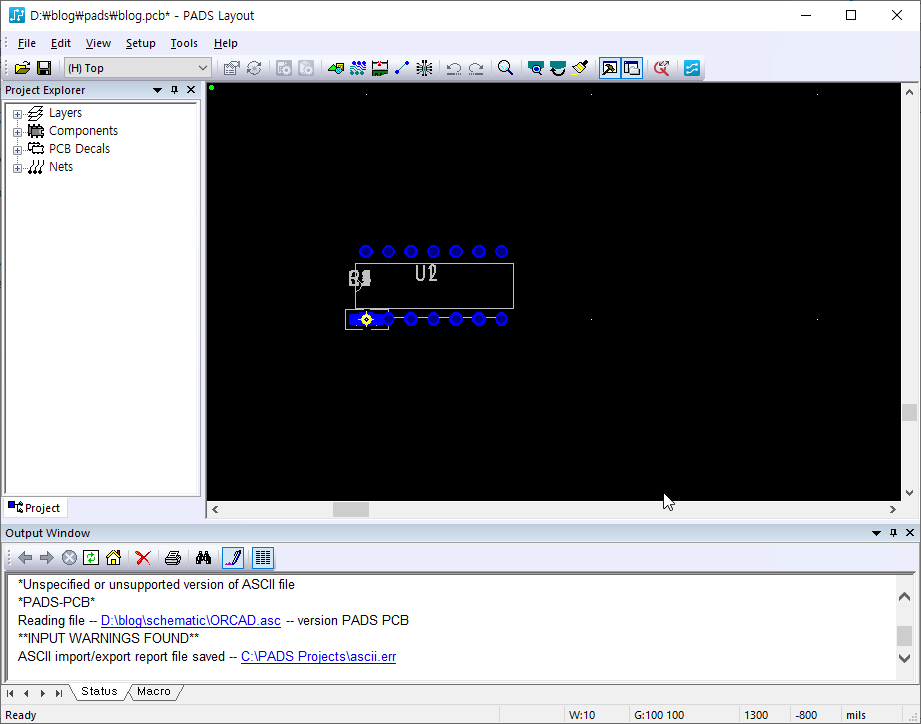
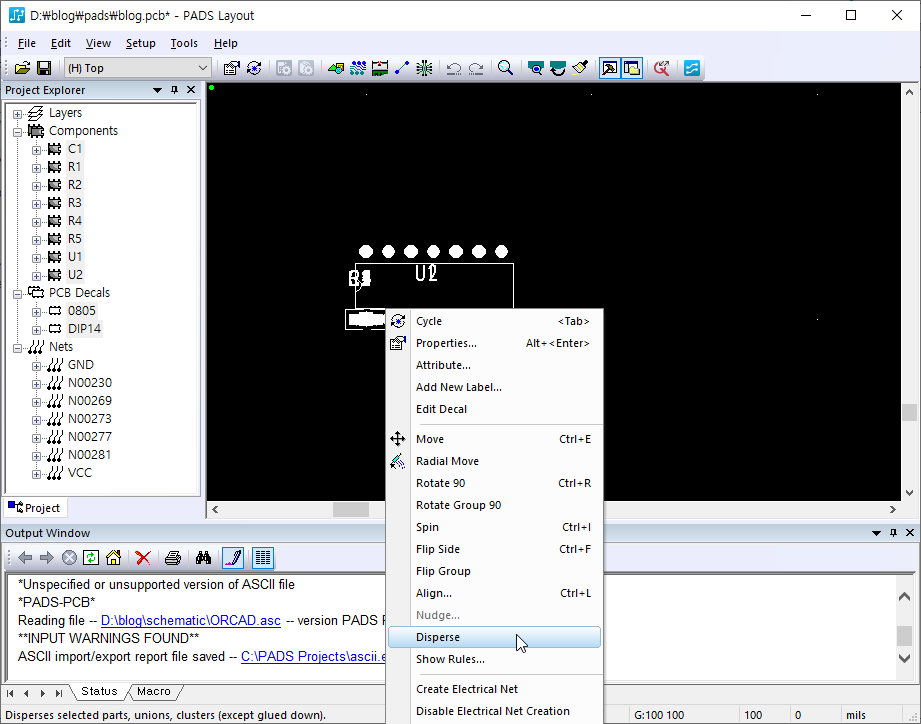
pads에서 부품이 모듈 단위로 회로가 그려져 있으며 각 부품 위치와 부품 번호 증분 값이 동일 할때 자동으로 모듈 단위 배치를 해주는 스크립트 이다.
채굴기 관련 보드 설계에서 사용했다. 배치가 편하게 수정 된다.
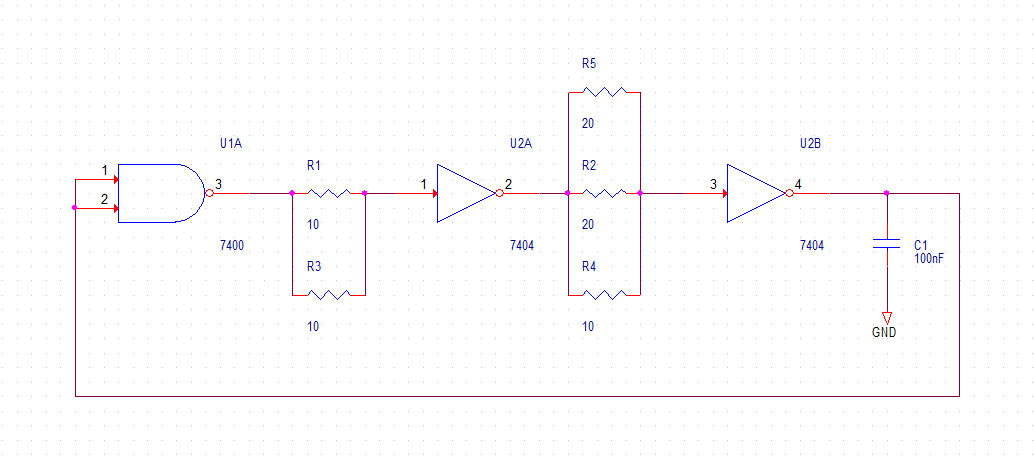
배선은 모듈 4가지 모듈을 사용했는데 각각 1개씩만 배선후 복사 붙여 넣기로 쉽게 작업을 했다.
이거 찾고 만드는데 약 5일정도 소요 된듯 하다. 5일이면 그냥 artworks 끝났을텐데 다음버전이나 조금씩 위치 변경 등등 여러 가지 발생 상황을 가정했을때 꼭 만들어 놓아야 하겠다고 판단하여 만들어 놨다.
Dim doc As Document
Dim tgtName As String
Dim refName As String
Dim tgtComp As Component
Dim refComp As Component
Dim dx As Double
Dim dy As Double
Dim rotation As Double
Dim page_count As Double
Dim part_count As Double
Dim input_number As String
Dim r_input_number As String
Dim ic_input_number As String
Dim rd_input_number As String
Dim x_position As Double
Dim y_position As Double
Dim c_start_number As Double
Dim r_start_number As Double
Dim ic_start_number As Double
Dim rd_start_number As Double
Dim x_inc As Double
Dim y_inc As Double
Dim c_inc As Double
Dim r_inc As Double
Dim ic_inc As Double
Dim rd_inc As Double
Dim step_count As Double
Sub Main
x_position = -32
y_position = 0
x_inc = -32
y_inc = 0
c_start_number = 40
c_inc = 30
r_start_number = 15
r_inc = 4
ic_start_number = 3
ic_inc = 2
rd_start_number = 5
rd_inc = 4
step_count = 0
Call move(CStr(c_start_number+(c_inc * step_count)),CStr(r_start_number+(r_inc * step_count)),CStr(ic_start_number+(ic_inc * step_count)), CStr(rd_start_number+(rd_inc * step_count)),(x_position+(x_inc * step_count)),(y_position+(y_inc * step_count)))
step_count = step_count + 1
Call move(CStr(c_start_number+(c_inc * step_count)),CStr(r_start_number+(r_inc * step_count)),CStr(ic_start_number+(ic_inc * step_count)), CStr(rd_start_number+(rd_inc * step_count)),(x_position+(x_inc * step_count)),(y_position+(y_inc * step_count)))
step_count = step_count + 1
Call move(CStr(c_start_number+(c_inc * step_count)),CStr(r_start_number+(r_inc * step_count)),CStr(ic_start_number+(ic_inc * step_count)), CStr(rd_start_number+(rd_inc * step_count)),(x_position+(x_inc * step_count)),(y_position+(y_inc * step_count)))
step_count = step_count + 1
Call move(CStr(c_start_number+(c_inc * step_count)),CStr(r_start_number+(r_inc * step_count)),CStr(ic_start_number+(ic_inc * step_count)), CStr(rd_start_number+(rd_inc * step_count)),(x_position+(x_inc * step_count)),(y_position+(y_inc * step_count)))
step_count = step_count + 1
Call move(CStr(c_start_number+(c_inc * step_count)),CStr(r_start_number+(r_inc * step_count)),CStr(ic_start_number+(ic_inc * step_count)), CStr(rd_start_number+(rd_inc * step_count)),(x_position+(x_inc * step_count)),(y_position+(y_inc * step_count)))
step_count = step_count + 1
Call move(CStr(c_start_number+(c_inc * step_count)),CStr(r_start_number+(r_inc * step_count)),CStr(ic_start_number+(ic_inc * step_count)), CStr(rd_start_number+(rd_inc * step_count)),(x_position+(x_inc * step_count)),(y_position+(y_inc * step_count)))
step_count = step_count + 1
Call move(CStr(c_start_number+(c_inc * step_count)),CStr(r_start_number+(r_inc * step_count)),CStr(ic_start_number+(ic_inc * step_count)), CStr(rd_start_number+(rd_inc * step_count)),(x_position+(x_inc * step_count)),(y_position+(y_inc * step_count)))
step_count = step_count + 1
Call move(CStr(c_start_number+(c_inc * step_count)),CStr(r_start_number+(r_inc * step_count)),CStr(ic_start_number+(ic_inc * step_count)), CStr(rd_start_number+(rd_inc * step_count)),(x_position+(x_inc * step_count)),(y_position+(y_inc * step_count)))
step_count = step_count + 1
Call move(CStr(c_start_number+(c_inc * step_count)),CStr(r_start_number+(r_inc * step_count)),CStr(ic_start_number+(ic_inc * step_count)), CStr(rd_start_number+(rd_inc * step_count)),(x_position+(x_inc * step_count)),(y_position+(y_inc * step_count)))
x_position = -16
y_position = 0
x_inc = -32
y_inc = 0
c_start_number = 25
c_inc = 30
r_start_number = 13
r_inc = 4
ic_start_number = 2
ic_inc = 2
rd_start_number = 3
rd_inc = 4
step_count = 0
Call move1(CStr(c_start_number+(c_inc * step_count)),CStr(r_start_number+(r_inc * step_count)),CStr(ic_start_number+(ic_inc * step_count)), CStr(rd_start_number+(rd_inc * step_count)),(x_position+(x_inc * step_count)),(y_position+(y_inc * step_count)))
step_count = step_count + 1
Call move1(CStr(c_start_number+(c_inc * step_count)),CStr(r_start_number+(r_inc * step_count)),CStr(ic_start_number+(ic_inc * step_count)), CStr(rd_start_number+(rd_inc * step_count)),(x_position+(x_inc * step_count)),(y_position+(y_inc * step_count)))
step_count = step_count + 1
Call move1(CStr(c_start_number+(c_inc * step_count)),CStr(r_start_number+(r_inc * step_count)),CStr(ic_start_number+(ic_inc * step_count)), CStr(rd_start_number+(rd_inc * step_count)),(x_position+(x_inc * step_count)),(y_position+(y_inc * step_count)))
step_count = step_count + 1
Call move1(CStr(c_start_number+(c_inc * step_count)),CStr(r_start_number+(r_inc * step_count)),CStr(ic_start_number+(ic_inc * step_count)), CStr(rd_start_number+(rd_inc * step_count)),(x_position+(x_inc * step_count)),(y_position+(y_inc * step_count)))
step_count = step_count + 1
Call move1(CStr(c_start_number+(c_inc * step_count)),CStr(r_start_number+(r_inc * step_count)),CStr(ic_start_number+(ic_inc * step_count)), CStr(rd_start_number+(rd_inc * step_count)),(x_position+(x_inc * step_count)),(y_position+(y_inc * step_count)))
step_count = step_count + 1
Call move1(CStr(c_start_number+(c_inc * step_count)),CStr(r_start_number+(r_inc * step_count)),CStr(ic_start_number+(ic_inc * step_count)), CStr(rd_start_number+(rd_inc * step_count)),(x_position+(x_inc * step_count)),(y_position+(y_inc * step_count)))
step_count = step_count + 1
Call move1(CStr(c_start_number+(c_inc * step_count)),CStr(r_start_number+(r_inc * step_count)),CStr(ic_start_number+(ic_inc * step_count)), CStr(rd_start_number+(rd_inc * step_count)),(x_position+(x_inc * step_count)),(y_position+(y_inc * step_count)))
step_count = step_count + 1
Call move1(CStr(c_start_number+(c_inc * step_count)),CStr(r_start_number+(r_inc * step_count)),CStr(ic_start_number+(ic_inc * step_count)), CStr(rd_start_number+(rd_inc * step_count)),(x_position+(x_inc * step_count)),(y_position+(y_inc * step_count)))
step_count = step_count + 1
Call move1(CStr(c_start_number+(c_inc * step_count)),CStr(r_start_number+(r_inc * step_count)),CStr(ic_start_number+(ic_inc * step_count)), CStr(rd_start_number+(rd_inc * step_count)),(x_position+(x_inc * step_count)),(y_position+(y_inc * step_count)))
'Call move("40","15","3","5",-32,0) //C, R, IC, RD, X OFFSET, Y OFFSET
'Call move("70","19","5","9",-64,0) //C, R, IC, RD, X OFFSET, Y OFFSET
'Call move("100","23","7","13",-96,0) //C, R, IC, RD, X OFFSET, Y OFFSET
'Call move("130","27","9","17",-128,0) //C, R, IC, RD, X OFFSET, Y OFFSET
'Call move("160","31","11","21",-160,0) //C, R, IC, RD, X OFFSET, Y OFFSET
'Call move("190","35","13","25",-192,0) //C, R, IC, RD, X OFFSET, Y OFFSET
End Sub
Sub move(ByVal cstart As String, ByVal rstart As String, ByVal icstart As String, ByVal rdstart As String, ByVal xoffset As Double, ByVal yoffset As Double)
Dim ret As Integer
'part_count = 0
'input_number = InputBox("RefDes : ", "C") 'ref number Input
'If input_number = "" Then
'Exit Sub
'End If
'r_input_number = InputBox("RefDes : R ", "R") 'ref number Input
'If r_input_number = "" Then
'Exit Sub
'End If
'ic_input_number = InputBox("RefDes : regulator ", "IC") 'ref number Input
'If ic_input_number = "" Then
'Exit Sub
'End If
'rd_input_number = InputBox("RefDes : regulator ", "RD") 'ref number Input
'If rd_input_number = "" Then
'Exit Sub
'End If
input_number = cstart
r_input_number = rstart
ic_input_number = icstart
rd_input_number = rdstart
tgtname = "c" + input_number 'Step 1 c part 10
dx = 0 + xoffset 'x position
dy = 10 + yoffset 'y position
rotation = 270 'rotation
Call ApplyMove()
tgtname = "c" + CStr(Val(input_number) + 1) 'next part 11
dx = 0 + xoffset
dy = 8 + yoffset
rotation = 90
Call ApplyMove()
tgtname = "c" + CStr(Val(input_number) + 2) 'next part 12
dx = 5 + xoffset
dy = 8 + yoffset
rotation = 90
Call ApplyMove()
tgtname = "c" + CStr(Val(input_number) + 3) 'next part 13
dx = 5 + xoffset
dy = 10 + yoffset
rotation = 90
Call ApplyMove()
tgtname = "c" + CStr(Val(input_number) + 4) 'next part 14
dx = -5 + xoffset
dy = 8 + yoffset
rotation = 270
Call ApplyMove()
tgtname = "c" + CStr(Val(input_number) + 9) 'next part 19
dx = 2.5 + xoffset
dy = -46.5 + yoffset
rotation = 0
Call ApplyMove()
tgtname = "c" + CStr(Val(input_number) + 10) 'next part c20
dx = 2.5 + xoffset
dy = -6.5 + yoffset
rotation = 0
Call ApplyMove()
tgtname = "c" + CStr(Val(input_number) + 11) 'next part c21
dx = 1.5 + xoffset
dy = 6.5 + yoffset
rotation = 0
Call ApplyMove()
tgtname = "c" + CStr(Val(input_number) + 12) 'next part c22
dx = 4.5 + xoffset
dy = -6.5 + yoffset
rotation = 0
Call ApplyMove()
tgtname = "c" + CStr(Val(input_number) + 13) 'next part c23
dx = 4.5 + xoffset
dy = -46.5 + yoffset
rotation = 0
Call ApplyMove()
tgtname = "c" + CStr(Val(input_number) + 14) 'next part c24
dx = 3.5 + xoffset
dy = 6.5 + yoffset
rotation = 0
Call ApplyMove()
tgtname = "r" + r_input_number 'Step 1 c part R8
dx = -5 + xoffset 'x position
dy = 10 + yoffset 'y position
rotation = 270 'rotation
Call ApplyMove()
tgtname = "r" + CStr(Val(r_input_number) + 1) 'next part R9 (R11)
dx = -0.5 + xoffset
dy = 6.5 + yoffset
rotation = 0
Call ApplyMove()
tgtname = "ldo" + ic_input_number 'Step 1 c part
dx = -2.5 + xoffset 'x position
dy = 9 + yoffset 'y position
rotation = 180 'rotation
Call ApplyMove()
tgtname = "ldr" + CStr(Val(ic_input_number)) 'next part
dx = 2.5 + xoffset
dy = 9 + yoffset
rotation = 90
Call ApplyMove()
tgtname = "rd" + rd_input_number 'Step 1 c part
dx = 0 + xoffset 'x position
dy = -10.5 + yoffset 'y position
rotation = 180 'rotation
Call ApplyMove()
tgtname = "rd" + CStr(Val(rd_input_number)+1) 'next part
dx = 0 + xoffset
dy = -29.5 + yoffset
rotation = 180
Call ApplyMove()
End Sub
Sub move1(ByVal cstart As String, ByVal rstart As String, ByVal icstart As String, ByVal rdstart As String, ByVal xoffset As Double, ByVal yoffset As Double)
Dim ret As Integer
'part_count = 0
'input_number = InputBox("RefDes : ", "C") 'ref number Input
'If input_number = "" Then
'Exit Sub
'End If
'r_input_number = InputBox("RefDes : R ", "R") 'ref number Input
'If r_input_number = "" Then
'Exit Sub
'End If
'ic_input_number = InputBox("RefDes : regulator ", "IC") 'ref number Input
'If ic_input_number = "" Then
'Exit Sub
'End If
'rd_input_number = InputBox("RefDes : regulator ", "RD") 'ref number Input
'If rd_input_number = "" Then
'Exit Sub
'End If
input_number = cstart
r_input_number = rstart
ic_input_number = icstart
rd_input_number = rdstart
tgtname = "c" + input_number 'Step 1 c part 25
dx = -2 + xoffset 'x position
dy = -48 + yoffset 'y position
rotation = 270 'rotation
Call ApplyMove()
tgtname = "c" + CStr(Val(input_number) + 1) 'next part 26
dx = 3 + xoffset
dy = -48 + yoffset
rotation = 270
Call ApplyMove()
tgtname = "c" + CStr(Val(input_number) + 2) 'next part 27
dx = 3 + xoffset
dy = -50 + yoffset
rotation = 90
Call ApplyMove()
tgtname = "c" + CStr(Val(input_number) + 3) 'next part 28
dx = 6.5 + xoffset
dy = -46.5 + yoffset
rotation = 180
Call ApplyMove()
tgtname = "c" + CStr(Val(input_number) + 4) 'next part 29
dx = -0.5 + xoffset
dy = -50.5 + yoffset
rotation = 0
Call ApplyMove()
tgtname = "c" + CStr(Val(input_number) + 9) 'next part c34
dx = 2.5 + xoffset
dy = 6.5 + yoffset
rotation = 0
Call ApplyMove()
tgtname = "c" + CStr(Val(input_number) + 10) 'next part c35
dx = 2.5 + xoffset
dy = -33.6 + yoffset
rotation = 0
Call ApplyMove()
tgtname = "c" + CStr(Val(input_number) + 11) 'next part 36
dx = 2.5 + xoffset
dy = -46.5 + yoffset
rotation = 0
Call ApplyMove()
tgtname = "c" + CStr(Val(input_number) + 12) 'next part 37
dx = 4.5 + xoffset
dy = -33.6 + yoffset
rotation = 0
Call ApplyMove()
tgtname = "c" + CStr(Val(input_number) + 13) 'next part 38
dx = 4.5 + xoffset
dy = 6.5 + yoffset
rotation = 0
Call ApplyMove()
tgtname = "c" + CStr(Val(input_number) + 14) 'next part 39
dx = 4.5 + xoffset
dy = -46.6 + yoffset
rotation = 0
Call ApplyMove()
tgtname = "r" + r_input_number 'Step 1 c part
dx = 1.5 + xoffset 'x position
dy = -50.5 + yoffset 'y position
rotation = 180 'rotation
Call ApplyMove()
tgtname = "r" + CStr(Val(r_input_number) + 1) 'next part
dx = 0.5 + xoffset
dy = -46.5 + yoffset
rotation = 0
Call ApplyMove()
tgtname = "ldo" + ic_input_number 'Step 1 c part
dx = 0.5 + xoffset 'x position
dy = -48.5 + yoffset 'y position
rotation = 270 'rotation
Call ApplyMove()
tgtname = "ldr" + CStr(Val(ic_input_number)) 'next part
dx = 5.5 + xoffset
dy = -49 + yoffset
rotation = 0
Call ApplyMove()
tgtname = "rd" + rd_input_number 'Step 1 c part
dx = 0 + xoffset 'x position
dy = -10.5 + yoffset 'y position
rotation = 180 'rotation
Call ApplyMove()
tgtname = "rd" + CStr(Val(rd_input_number)+1) 'next part
dx = 0 + xoffset
dy = -29.5 + yoffset
rotation = 180
Call ApplyMove()
End Sub
Sub ApplyMove()
Dim doc As Document
Dim tgtComp As Component
Set doc = Application.ActiveDocument
Set tgtComp = doc.Components(tgtName)
tgtComp.Move dx, dy 'component move
tgtComp.Orientation = rotation 'coponent rotation
'MsgBox "[" & tgtName & "] moved by (" & dx & ", " & dy & ")"
End Sub
'Hardware' 카테고리의 다른 글
| PADS 에서 Script 사용. (0) | 2025.04.28 |
|---|---|
| PADS 창 짤리는 문제 (0) | 2024.10.17 |
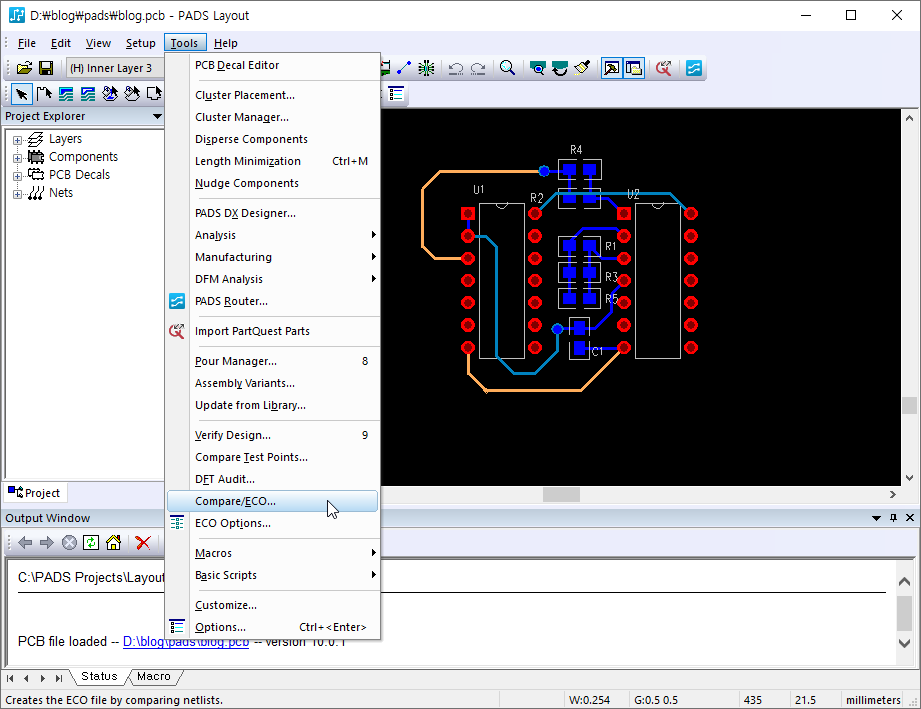
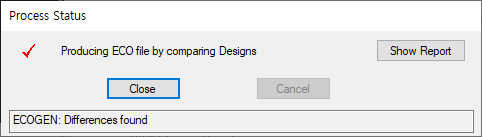
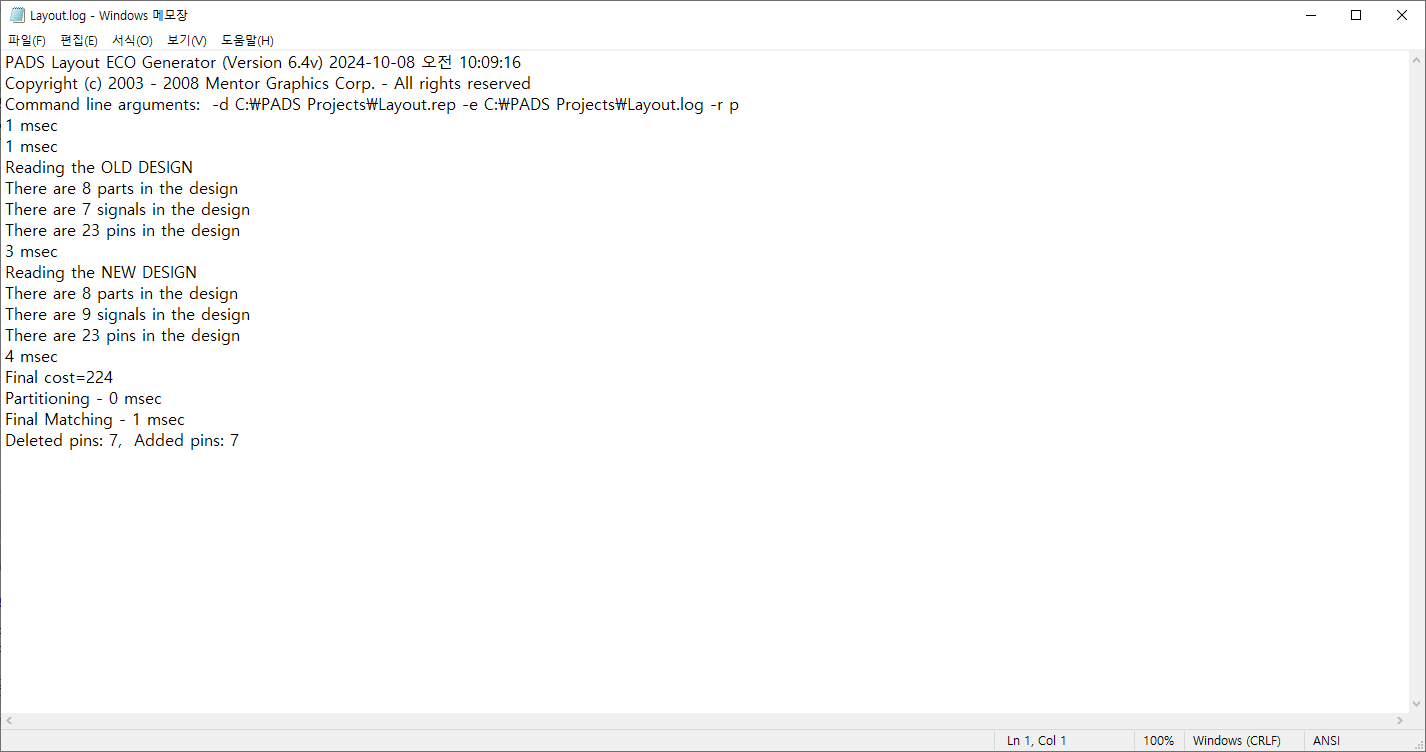
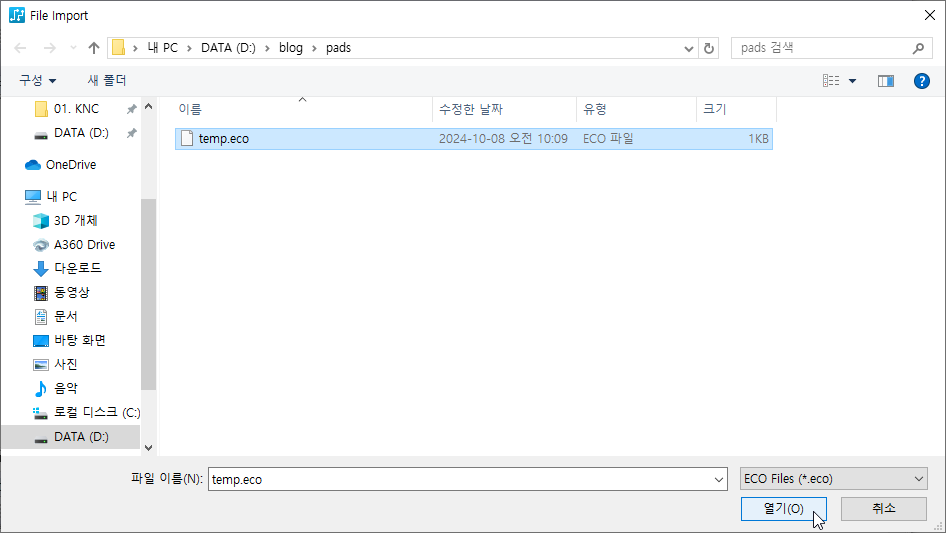
| 변경된 회로 Pads에 적용하기 (1) | 2024.10.08 |
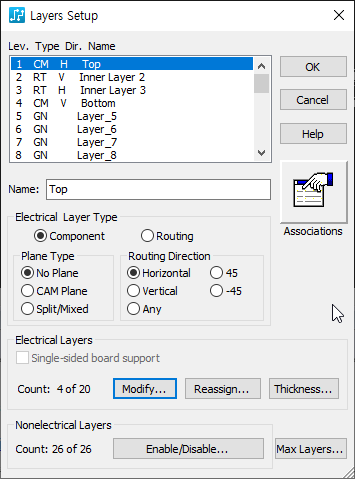
| PADS에서 다층 기판 셋팅하기 (0) | 2024.10.07 |
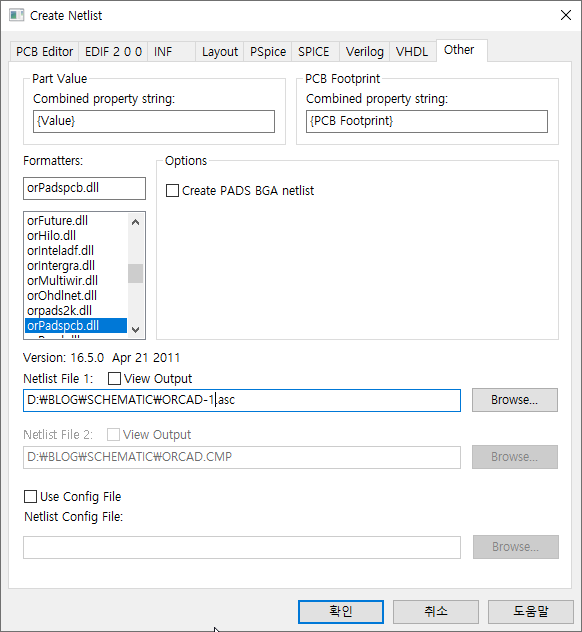
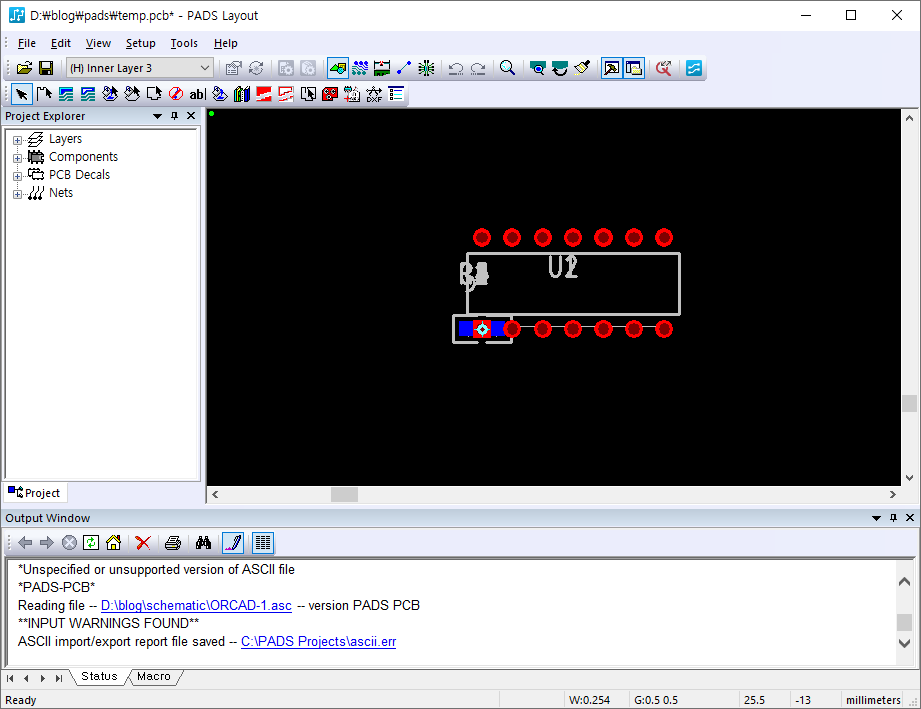
| PADS에서 ORCAD Netlist 불러오기. (4) | 2024.10.07 |